قد يؤدي تركيب مجموعة الدش بشكل غير صحيح إلى حدوث تسربات, ضغط مياه غير متساوٍ، وإصلاحات مكلفة لاحقاً. يشعر العديد من مالكي المنازل بعدم اليقين بشأن التعامل مع توصيلات خلاط الدش ومحاذاة رأس الدش بمفردهم. والخبر السار هو أنه مع الإعداد الصحيح والأدوات والتوجيهات الصحيحة، يمكن إكمال تركيب مجموعة الدش بأمان واحترافية، حتى من قبل غير الخبراء.
 https://www.chinawuhuang.com/portfolio/shower-set-99
ما هي الأدوات والمواد اللازمة؟
قبل البدء، قم بإعداد مفتاح ربط قابل للتعديل، ومستوى روحي، ومثقاب مع لقم بناء، وشريط PTFE، ومفك براغي، وشريط قياس، وسدادات حائط، ومسامير، ومانع تسرب السيليكون، ومجموعة دش كاملة بما في ذلك خلاط الدش ورأس الدش. وجود جميع الأدوات جاهزة يضمن عملية تركيب فعالة وخالية من الانقطاع.

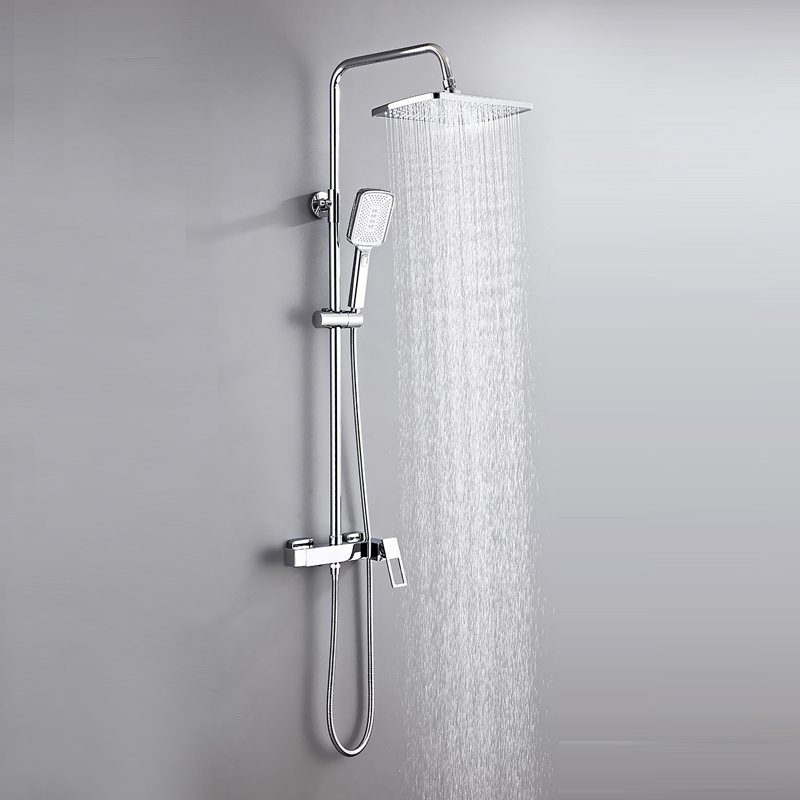
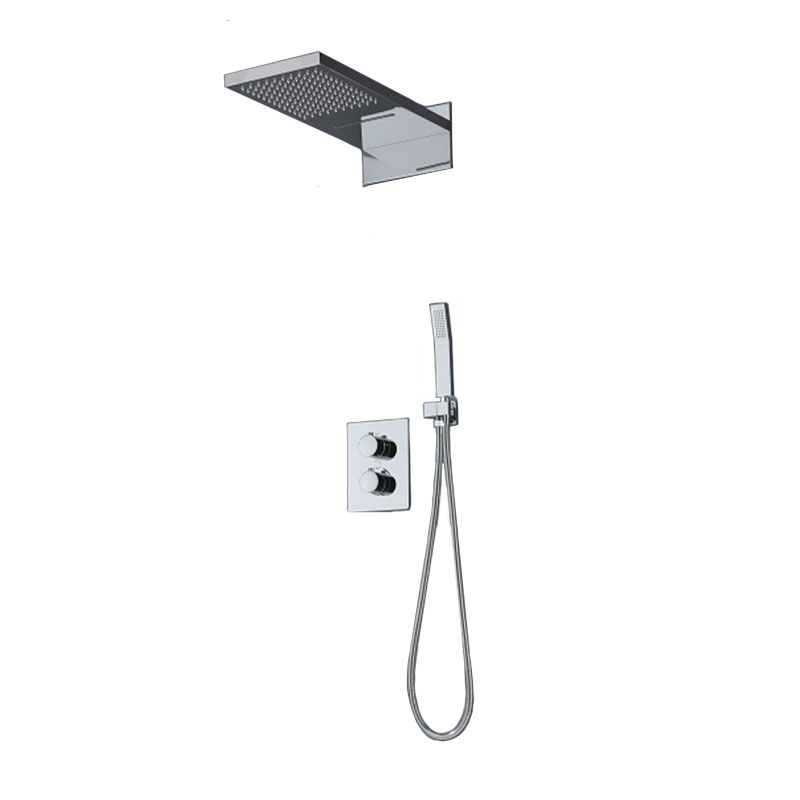
يتضمن تركيب الدش تركيب خلاط الدش بإحكام، وتوصيل إمدادات المياه الساخنة والباردة، وإغلاق جميع الوصلات الملولبة، وتثبيت رأس الدش بالارتفاع والزاوية الصحيحين. ابدأ بإغلاق مصدر المياه، واتباع تعليمات الشركة المصنعة بعناية، واختبار الضغط على جميع الوصلات قبل الإغلاق النهائي. المحاذاة السليمة والعزل المائي ضروريان لضمان الأداء والسلامة والراحة على المدى الطويل أثناء الاستخدام اليومي.
إذا كنت ترغب في الحصول على نتيجة متينة وخالية من التسريبات وذات مظهر احترافي، تابع القراءة للحصول على شرح مفصل خطوة بخطوة.

كيفية تركيب الدش: دليل مفصل خطوة بخطوة
يبدأ تركيب مجموعة الدش الناجحة بالتحضير الشامل والتنفيذ الدقيق. الخطوة الأولى هي إيقاف تشغيل مصدر المياه الرئيسي لمنع حدوث فيضان عرضي. بمجرد إيقاف تشغيل المياه، افتح الصنابير الموجودة لتحرير الضغط المتبقي في الأنابيب. هذه الخطوة ضرورية للسلامة والدقة أثناء التركيب.
بعد ذلك، ضع علامة على موضع خلاط الدش على الحائط. استخدم ميزاناً روحياً للتأكد من أن الخلاط سيكون أفقياً تماماً. يمكن أن تتسبب المحاذاة غير الصحيحة في هذه المرحلة في حدوث مشاكل طويلة الأمد، بما في ذلك التدفق غير المتساوي للمياه والعيوب الجمالية المرئية. قم بحفر الثقوب اللازمة وفقاً لقالب التركيب المرفق مع مجموعة الدش، ثم أدخل سدادات الحائط للتثبيت الآمن.
قم بتوصيل أنابيب الماء الساخن والبارد بخلاط الدش، مع التأكد من التوجيه الصحيح - الساخن على اليسار والبارد على اليمين في معظم المعايير. ضع شريط PTFE على جميع الوصلات الملولبة لمنع التسرب. أحكم ربط الوصلات بإحكام ولكن تجنب الإفراط في الشد، مما قد يؤدي إلى تلف الخيوط أو الأختام الداخلية.
بمجرد توصيل خلاط الدش، قم بتركيبه بإحكام على الحائط. أعد تشغيل مصدر المياه ببطء وتحقق من عدم وجود تسرب. إذا تم اكتشاف أي تسرب، قم بإيقاف تشغيل المياه وأعد إحكام إغلاق الوصلات المتأثرة أو أعد إغلاقها. مرحلة الاختبار هذه ضرورية قبل المضي قدماً.
بعد التأكّد من أن خلاط الدش يعمل بشكل صحيح، انتقل إلى تركيب السكة الصاعدة أو ذراع الدش. قم بقياس الارتفاع الصحيح لرأس الدش بناءً على راحة المستخدم، ثم قم بحفر الأقواس وتثبيتها. قم بإنهاء التركيب بإغلاق جميع اختراقات الجدار بمادة السيليكون المانعة للتسرب لمنع تسرب المياه خلف البلاط. يضمن هذا النهج الشامل أن يكون تركيب مجموعة الدش موثوقاً وآمناً ونظيفاً بصرياً.
كيفية تركيب مجموعة رأس الدش
تركيب مجموعة رأس الدش هي المرحلة الأخيرة والأكثر وضوحاً في عملية تركيب مجموعة الدش. ابدأ بتحديد ما إذا كان رأس الدش مثبتاً على الحائط أو مثبتاً في السقف أو متصلاً بنظام سكة حديدية. يتطلب كل تكوين معالجة مختلفة قليلاً، ولكن تظل المبادئ الأساسية هي نفسها.
قم بلف شريط PTFE حول المخرج الملولب حيث سيتم توصيل ذراع الدش أو الخرطوم. هذه الخطوة ضرورية لمنع التسرب عند الوصلة. قم بربط ذراع الدش أو الخرطوم المرن بعناية في مكانه باليد أولاً، ثم اربطه برفق باستخدام مفتاح ربط قابل للتعديل. استخدم دائماً قطعة قماش بين مفتاح الربط وأسطح الكروم لتجنب الخدوش.
قم بتوصيل رأس الدش بالذراع أو الخرطوم، مع التأكد من أن الغسالة الداخلية مثبتة بشكل صحيح. إن الغسالة المفقودة أو غير المثبتة بشكل صحيح هي سبب شائع للتسريبات. بمجرد التوصيل، اضبط زاوية رأس الدش لتتناسب مع اتجاه الرش المطلوب. بالنسبة للموديلات القابلة للتعديل، تأكد من أن الوصلة الدوارة تتحرك بسلاسة دون مقاومة.
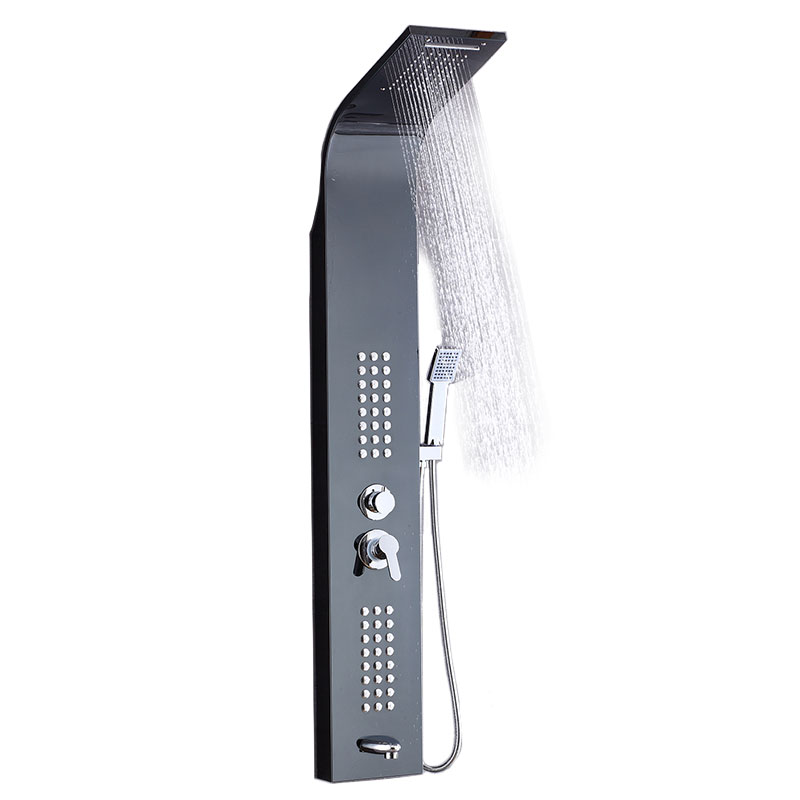
قم بتشغيل مصدر المياه واختبر رأس الدش عند الضغط الكامل. لاحظ نمط الرذاذ وتحقق من عدم وجود قطرات حول الوصلات. في حالة وجود تسربات، قم بإحكام الربط قليلاً أو أعد وضع شريط PTFE حسب الحاجة. بالنسبة لرؤوس الدش المطري، تأكد من توزيع المياه بالتساوي عبر جميع الفوهات.
وأخيراً، نظف سطح رأس الدش وأزل أي بقايا من التركيب. يعمل رأس الدش المثبت بشكل صحيح على تحسين الراحة وكفاءة استخدام المياه وجماليات الحمام بشكل عام. عند دمجها مع خلاط الدش المركب بشكل صحيح، فإن مجموعة الدش الكاملة توفر أداءً ثابتاً وموثوقية طويلة الأمد.
الخاتمة
يضمن التركيب الصحيح لمجموعة الدش السلامة والمتانة والأداء الأمثل. من خلال تركيب خلاط الدش ورأس الدش بعناية، يمكنك الاستمتاع بتجربة دش موثوقة وخالية من التسرب لسنوات قادمة.